

My shift ended on December 1, 2015 like any other day but before exiting my workplace I picked up my pre-order of Rainbow Six Siege. A few weeks beforehand I’d scoured the depths of the internet in search of a new game to purchase and I was intrigued by R6’s concept. As someone who has enjoyed many Tom Clancy games in the past and as someone who loves FPS, I figured I’d take a chance on R6. My first night of breaching madness left me confused and yearning for more of an understanding of the game. Coincidentally Rainbow Six was released during a busy time of my college career and I soon found it difficult to find time to play the matches that could range from a half an hour to an hour each. I would seldomly play on the weekends until the fall of 2016, where I found myself investing more and more time to playing Rainbow Six Siege. Jumping into Rainbow Six in the early days was an easy transition as you rarely found yourself against premade teams that truly knew what they were doing. If you’re finding yourself jumping into Rainbow Six Siege in 2018 then this is the article for you, I’ll be covering a wide array of topics to help you lessen your new player induced rage.
gg 2 ez.
So you’ve done it. It’s 2018 and you’ve decided to jump into Tom Clancy’s newest first person shooter, Rainbow Six Siege. You’ve played first person shooters before, how difficult could it be? As a spectator R6 may seem quite simple but underneath the quick rounds, headshots, and reinforcing there is an entanglement of teamwork which can be destroyed by one individual slacking on their part of the puzzle but I’ll fill you in on that later. Before we get started there’s a few things you should understand:
- There are no respawns (Similar to Call of Duty’s Search and Destroy Mode)
- Rainbow Six Siege offers the ability to tilt your weapon to each side. (Change the angle of your reticle, allowing you to “peek” around corners)
- Each operator must be purchased with Renown
- There are three game types: Bomb, Secure Area, and Hostage. Today I will be focusing on the Secure Area game mode.
Being successful in R6 requires expansive map knowledge, this allows you to understand each approach you could utilize in a variety of scenarios. There are two matchmaking playlists in Rainbow, casual and ranked. Casual can be plagued with toxic behavior from your teammates but is the easiest way to learn each map and the tactics some players may use on them. If casual matchmaking is not for you, there is always terrorists hunt which you can do with a group or “lone wolf.” Attempting the terrorist hunts lone wolf will provide you with an intense experience that will force you to develop an understanding of each map because you will have to single handily finish off the terrorist forces.
Tom Clancy’s R6 lacks a firing range which means you cannot test your weaponry on, instead you will have to tweak each weapon during the match or after. Each weapon has an array of attachments that can be used to customize your weapon for your own. Barrels, scopes/reticles, and grips will alter the spray pattern of the weapon even if it is just a slight change. You can determine the changes that will occur by the spray pattern diagram found in the load-out tab found separately for each operator.
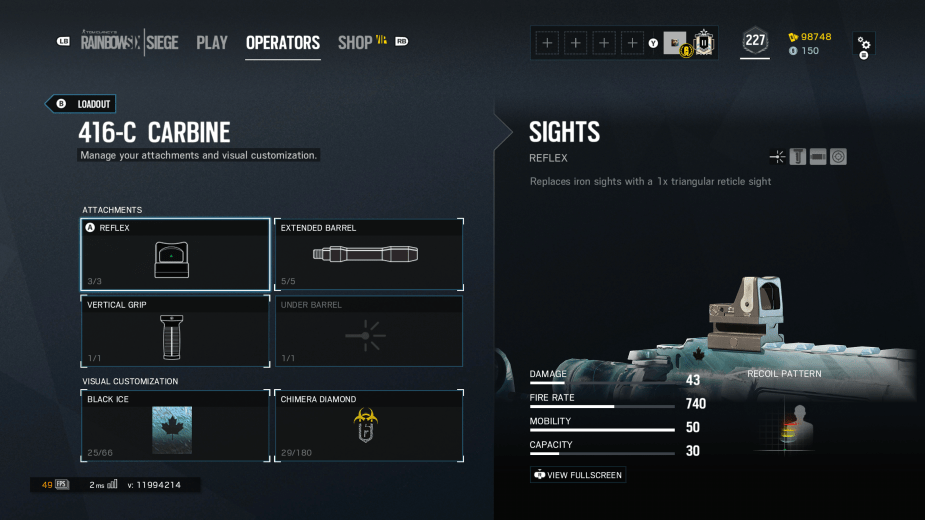
You will find that particular operators will have more options for customization than others. The most important attachment in the game is the ACOG Sight which is available for only certain operators. The ACOG provides the player with a greater range of sight in both distance and angles.
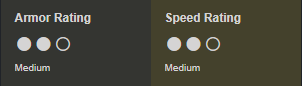
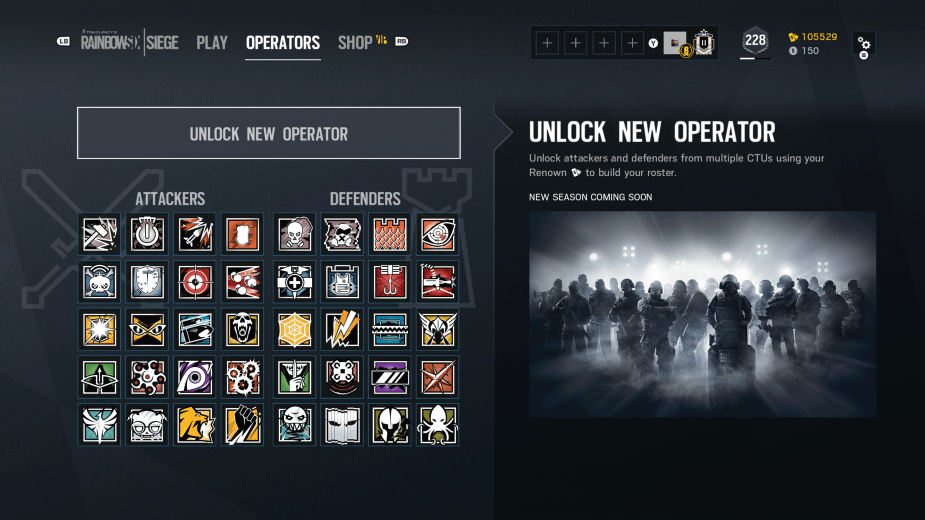
Each operator is categorized into two groups, attackers and defenders. The operators are not interchangeable between attack and defense. Every operator is also classified into an armor and speed type. Your operator will play differently depending on each attribute. Each operator offers checks and balances in the idea that they are not spectacular at everything but excel at a few things in particular but not everything. Your play-style will change depending on your operators armor and speed rating.
Dozens of hours in game will be required to get a full grasp of the capabilities of each operator and their unique approach to securing the objective. Each operator has a loose role on each team. This does not mean that you need to adhere to the meta of your operator although there are a few cases of operators that should make sure to commit to their role. Some operators may include, but are not limited to, bandit, mute, and mira. To develop your own play style and understanding of a character you will need to commit to playing that particular character often with a wide variety of additional operators on your team to truly flush out your own personal sense of the operator. Just because you witnessed a streamer use an operator in one way does not mean that you are required to stick to that strategy. This is where Rainbow Six Siege outshines its competition as you are able to meticulously tweak your strategy to perfection, all depending on what map you’re playing on and which secure site you’ll be attacking.
You can find the optimal Rainbow Six Siege experience after finding four other people to consistently play ranked with you, reassuring that you won’t fall victim to the sometimes toxic matchmaking in R6. After a developing an understanding for your teammates play style you will find yourself being able to integrate your separate strategies into one to, hopefully, synchronize into a victory.
Communication is essential in achieving victory in Rainbow. Your entire team must understand the basic necessities of siege to effectively communication, i.e. room names, operator names, and gadgets. Using the team to your advantage, even if you’ve died, is important in every scenario in R6. Even if you’ve found yourself defeated by the opposition you can still call out to your team, identifying where they’re located and where they may be hiding. This should allow your team to perform a “trade.” A trade is when you find yourself simultaneously killing your opponent while dying or also when you call out the enemies position of where they killed you, subsequently allowing your team to kill them; therefore “trading” deaths. This levels the playing field by removing one of five essential members of a team off of a map.
Information is the key to winning most Rainbow Six Siege matches. The game’s foundation provides players with drones to scout out the map, cameras to survey the building, and equipment to gather ongoing data throughout the match. It is your job to implement each of these tools properly to find success in Rainbow Six. There is a time and a place for each tool to be utilized but remember, there is only a select number for your team to use. Carelessly using your equipment early in the round may cause your team to be blind while infiltrating the building and the objective. Finding and eliminating all equipment, cameras, and drones that you can throughout the round is essential in providing your team with the best chance to win.
The Basics
Defending
For the sake of simplicity I will be categorizing defenders into two categories, roamers and anchors. Depending on the situation, your team should be a combination of both roamers and anchors.
Anchors are the players on your team that are holding down the objective. Their job is to stay alive and prevent the enemy team from merely rushing into the objective. Anchors will have the best success when the attackers have almost run out of time in the round, causing the offense to rush their attack.
If you’re team has properly utilized their equipment, anchors should be able to sustain the objective defense throughout the round. Anchors should make sure to not reveal themselves to the attackers unnecessarily. Your team may find themselves being rushed if the attackers find out the room is not secure, in which you will most likely lose.
Roamers will be everywhere except for the objective. The roamers will be in charge of flanking the attackers as they approach the objective and should also be focused on stalling the attackers anyway possible. The time constraint of each round can be the determining factor in whether the attackers can execute their strategy correctly. If stalled, the attackers will not have time to properly clear rooms, breach where necessary, or sometimes even work together. Rainbow Six is a machine with many moving parts, if one gear fails then you may find yourself at the losing end of the match. You must make sure that you and your team are doing the basics to ensure the best possibility of success.
There are numerous tactics to roaming but you need to understand that just because a tactic works well for one person, does not mean it will work well for you. Also, your fellow roamers will play a large role in determining your success as a roamer. Will they attract the attention of the attackers and then bring them directly to you? Will both of you rotate the exact same direction, causing the easiest double kill to be seen? Use your gadgets, the environment, and cameras to get an edge over the attackers.
Attacking
For all the plebs out there I will be dividing the attackers into two groups, utility characters and slayers. Utility characters are operators that play an important role in breaching a wall and/or supporting the rest of the team. Slayers are operators that should be focused on tracking down and killing the defensive players on the map. Both the utility and slayer operators should be work together to clear rooms and to breach into the objective. Each side supports one another by performing their own job, the slayers find and eliminate the roamers which allows the utility characters to breach a wall safely, greatly increasing your chance at winning the round.
For example, Thermite is a utility character that can create large holes in walls. He provides another way into the room with his device, creating a disturbance that the defense has to deal with. Ash is a slayer operator, her main duty is the utilize her speed to defeat the defense. Her breaching round may be considered utility in the case that the defense has a castle but will most likely not be focused on created openings similar to Thermite.
Spawn Points
Players will go to any sort of lengths to get ahead in a ranked match of Rainbow Six Siege. One strategy that many players utilize is to spawn peak the various areas of the map that the attackers will be spawning in hopes of eliminating them before they even have a chance to fight back. You can avoid this from happening by carefully choosing your spawn point while also understanding how the defense may be attempting to spawn kill you from.
Skyscraper: Ventilation Units – Spawning on the ventilation units provides you with immediately cover from spawn peakers but, as with any area on Skyscraper, it can be difficult to approach the building at all without being spawn peaked. Most importantly, take your time making your way towards the objective. The allotted time is meant to be used and there is no rush.
Border: East or West Vehicle Entrance – Each of these spawns are your best bet in minimizing the opportunity for the defense to spawn kill you.
Kafe Dostoyevsky: Park Alley
Consulate: Riot Barricade – You must always be prepared for the defenders to attempt to spawn peak on Consulate. The riot barricade spawn allows you to have cover when checking the multiple ways defenders may be trying to peak you.
Theme Park: Bumper Cars – The bumper car spawn is by far the safest spawn point on Theme Park. If you take a right out of the spawn you can check both windows located in cash room and the connector below. Players can easily check each window through the car window of the wide van at the edge of the spawn.
Club House: Construction Site – There are three points of opportunity for spawn killing on the construction site spawn. They can each be easily checked after destroying the camera looking down on you. First you can check the lower dirt tunnel spawn kill in which players will impact grenade their way out of the tunnel. Next you should check supply room door and then finally the kitchen door. You will find that more than often the defenders will attempt to spawn-kill from the stairwell window instead of the kitchen door.
Bank: Parking Front / Alley Access – Bank is a tough map to avoid being spawn-killed if your opposition is intent on spawn-killing you. On any of the spawn choices there are three different approaches that the defense can use to attempt to spawnkill you.
Selecting a Defensive Position
Selecting a defensive position comes down to a vote. This means you need to pay close attention to the vote, allowing you the time to change your character if you may pick a particular operator on certain defenses.
I will list each defensive position in order of greatest to worst. You need to remember that this pertains to secure area.
Chalet:
- Dining Room
- Snowmobile Garage
- Bar
- Library
Theme Park:
- Day Care
- Office
- Drug Lab
- Haunted Dining
Border:
- Lockers
- Office
- Workshop
- Tellers
Coastline:
- Penthouse
- Billiards
- Kitchen
- Blue Bar
Skyscraper:
- Tea Room
- Work Office
- Barbecue
- Bedroom
Villa:
- Art Storage
- Living Room
- Study
- Bedroom
Bank:
- Lockers
- Open Area / Archives
- Never Vote CEO
Consulate:
- Archives / Administration
- Garage
- Never Vote Tellers
Oregon:
- Laundry Room
- Dorms
- Meeting Hall
- Kitchen
Clubhouse:
- Arsenal Room
- Bedroom
- Garage
- Bar
Kafe Dostoyevsky:
- Train Room
- Kitchen
- Reading Room
- Cigar Shop
Variety is the spice of life and this remains the same in Rainbow Six Siege. Each position may have a multitude of options to utilize as a defense. It is vital to understand how the changes being made will alter your defense. Use your two reinforcements to fortify the defensive position. Just playing matches will help you learn where to reinforce but if you are unsure of where to place them, there is normally a hatch that needs to be reinforced on each defense. If you are a three speed character, it can be helpful to take care of reinforcing the hatch.
Utilizing Your Drone
You will be provided with two drones each offensive round. Conserving drones is important after you discover what defense you’ll be attacking and what operators they will be using. Parking a drone in areas that are heavily patrolled can assist the team even if you die. Synchronizing your droning with your teammates can be an effective way to approach a room and/or building.
Knowing when to mark on your drone is important as it can giveaway important information to the defenders. Knowing the call outs to each map will ensure that you will only need to mark in dire situations. When droning it is important to attempt to conceal your drone from defenders or they may rotate before you can act on the information that you’ve gathered.
Defensive Cameras
Each map features numerous cameras which can be easily destroyed but may also be essential in locating and identifying the attackers. Understanding what is approaching you is useful in coordinating your strategy. For example, if you identify the attackers did not bring a hard breacher (Hibana / Thermite) than you can commit other defenders to alternate portions of the map because you don’t need to worry about hard breaching. Cameras also provide anchors an opportunity to aid the roamers, providing call outs to your teammates as to where the attackers are located.
Operators For New Players
Many of the operators new players will be using are original operators as the new operators can be expensive. If you are looking for more insight into each of the operators you can visit the official Rainbow Six operator web page.
Defensive Operators
Doc – Doc provides a three armor anchor that can withstand numerous bullets. You will be able to survive more gunfights as Doc and his Stim Pistol can provide healing to you and your teammates. Most importantly, Doc is one of the few operators to be able to utilize an ACOG scope.
Jager – Jager’s ADS device can be essential in preventing the attackers from penetrating the defense. The ADS will elminiate projectiles from the air including, but not excluded to, Ash’s device, flash-bangs, and frag grenades. Placing his device in pivotal spots of the defense will aid your team even if you are roaming. Jagers speed allows him to roam effectively in any area as his assault rifle is the strongest gun on defense. Since his weapon allows him to engage from long distances, he can take particular angles that other roamers may not have the weaponry to do.
Kapkan – Kapkan can provide proximity security for your defensive perimeter. His five traps can be used to close off certain zones of the map, informing you of attackers that are approaching either because they hit the trap or because they were forced to shoot it. Kapkan provides time for your team to rotate towards the attackers as they need to take extra time to approach Kapkan. Paired with a nitro-cell, Kapkan is dangerous against a cluster of attackers and can also eliminate shield characters. Try and pick off attackers while they navigate your Kapakan traps with your SMG. Force your opponent to make their way through your defenses to improve the chance of victory.
Mute – Mute can be quite boring. Even though Mute may be boring at times, he can be a nuisance to the attackers, jamming drones and devices. The jamming devices can prevent the attackers from gathering essential intel and breaching. Mute’s weapon is different from Doc’s and Rook’s Mp5; many players find his weapon more difficult to use but when mastered it can effectively head-shot your opponents. Mute’s loadout can include a nitro-cell which can provide him with the extra firepower he needs to be an effective choice.
Attacking Operators
Ash – Ash will feature a run and gun style for players who are looking for an experience as close to Call of Duty as you’ll get in R6. Her weapon selection offers two solid assault rifles that are efficient in both close to long range engagements. Use Ash to destroy the defenders utility, walls that are not reinforced, and the floor/ceiling.
Thermite – Thermite is one of two hard breachers currently in Rainbow Six Siege. After dismantling the defenses Mutes / Bandits you will be able to destroy reinforced walls, opening entrances and peak points detrimental to the defense.
Twitch – Twitch has the ability to dismantle select utility items on the defensive side. Most importantly, she can destroy Mutes, Kapkans, and Jagers. Her shock drone can also do 10 damage to enemies it shocks. Twitch’s superior assault rifle, the F2, provides her the opportunity to win a gunfight with almost any operator. Twitch’s speed and weaponry causes her to be an essential pick to any team.
Sledge – Sledge well, he has a hammer. This hammer can breach any surface that are not reinforced, providing you with quick access into a room. Using this to your advantage is vital to succeeding as Sledge. Use Sledge to quickly pincer roamers and take advantage of any surface that the defense may have left vulnerable. Sledge also has frag grenades which can be used to kill unsuspecting defenders that aren’t near a Jager device.
Of course with time you can farm renown and move onto using a variety of operators. The operators above can be effective even to new players that have not developed map knowledge and strategies. Head-shots are the bread and butter of Rainbow Six Siege and finding your own personal favorite operator is essential to succeeding in R6, as it will allow you to perfect your aim.
Specific Map Strategies
Below I will identify a few key strategies needed to attack certain, pivotal objectives. There are always more than one way to attack an objective, this is merely my favorite way to attack it.
Chalet – Snowmobile Garage


Hibana, Thermite, and Thatcher should approach the Snowmobile Garage Door. Be careful of the C4 from through the window. You can avoid this by spacing yourself out properly, trying to stay as far back from the outside Snowmobile as possible. Timing is key to breaching the Snowmobile Garage. You can out maneuver the Bandit by following these steps.
- Destroy any Bandits that are currently on the wall with a Thatcher.
- Hibana and Thermite should be ready to quickly approach the wall. Hibana should first shoot her pellets on the left side of the garage, setting them off instantly.
- Waiting until the pellets land, Thermite should then place his charge on the right wall, hopefully throwing the Bandit off.
- The Thatcher should be destroying any Bandits placed down to destroy either the breaching devices. Since Bandit is limited in both movement and devices you should be able to open up the garage door between your five devices.
- If you forget to bring a Thermite but can destroy the Bandit’s on the garage then it is worth it to send Hibana to the garage and place a pellet in the middle of the garage. Since Bandit can only place one at a time you may catch him off guard, opening a small hole into the objective.
Jackal and Blitz should be doing everything they can to tracking down the roaming defenders and eliminating them. If this has been accomplish, you can begin to the destroy the ceiling and/or approach from the Wine Cellar. This will force the defense to be split in defending from both directions.
Border – Lockers Wall


You should not approach the Locker wall until the security room has been secured. You can utilize the Dokkaebi and Ying devices to identify and blind whatever operator is in the security room. Once the security area is clear, it is safe for Dokkaebi to leave and approach the room from another angle. Ying should be able to hold the connector to Security while Thatcher and Thermite work on the main wall. The defensive utility should be eliminated by either Thatcher or Buck. After the wall is clear for Thermite, Thatcher should position himself to protect Thermite from the run out of the front door. Once the Thermite has been set off, Thatcher should ensure no one runs out to shoot it while Thermite falls back to a safe position.
After opening the locker wall you should incorporate Ying into the mix, having Thatcher watch the hallway and eventually push from the office door. Since Thatcher should of destroyed all Jagers and Lesions you should be safe to flash into the room to eliminate the person in the lockers corner, securing your entry into the room. Done properly, the split push should allow for a weakness to be exposed in the defense.
Buck should be doing as much damage as possible from below as this is all going down. You must remember that roamers may be approaching you from the first floor as you destroy the floor.
Coastline – Penthouse


When you attack the Penthouse you must keep in mind that there will be numerous corners that the defense will utilize to their advantage. This is where your utility will come into play, specifically your Candelas, frag grenades, and flash-bangs. Be sure to keep your eye out for spawn peaks as you approach the VIP balcony, safely position yourself on the balcony before destroying the windows. Eliminate any threats in the VIP lounge by having Thermite / Thatcher drone out the area as Ying prepares to push in.
After the VIP Lounge has been cleared you should be able to open the main wall. Have Thatcher watch the Hall of Fame Hallway while Ying watches back towards Billiards as Thermite does his thing.
Once the hole has been opened, Thermite should retreat to the balcony window. He should then peak into the room and then shift his attention towards connector hallway as Ying makes her way towards the hole in the wall, using her Candelas to blind any remaining defenders in the room. If the defenders are contesting they are most likely hiding near the objective. Merely toss a Candela or grenade to easily eliminate them, you must only be careful of those remaining in the theater room and of course if the players in the room somehow did not get flashed.
Finka and Lion should be separated on the map. Lion should attempt to pick off any rotation from the roof while using his ability to aid those within the building. Finka should be making her way through the first floor of the building, searching for any Pulse that may be attempting to shoot through the floor.
If you are finding these step by step guides helpful please let me know! I can create video demonstrations of each of these attacks if that would help. If there is anything you would like for me to add to the guide please let me know, I’ve arranged a wide variety of information that I believe would be helpful when just getting into Rainbow Six Siege.
Rainbow Six Siege will continue to evolve as new operators are released and the rules will continue to be altered. R6 can be a difficult game that has enormous highs with thrilling victories but R6 can also prove to be infuriating but you must always remember that your strategies can always be changed. Just as the game is, your play is always evolving as you learn new strategies from spending time in matchmaking and/or watching the professionals.
Shameless Plug – Make sure to subscribe to my Youtube Channel and follow me on Twitch to witness more Rainbow Six Siege action! Be sure to check back on the blog for future R6 strategy guides and more! Thank you for taking the time to read my thoughts on Rainbow Six.
R6 Montage – https://www.youtube.com/watch?v=59yj6DVP_q4
Pleb Six Volume 3 – https://www.youtube.com/watch?v=zIMGXSjKJiY


[…] the year. My original controller fought the good fight and lasted almost three years of grueling Rainbow Six Siege action, finally giving out after the right bumper disconnected upon endless torment from placing […]
LikeLike